
Kelowna Strata Snow Removal: Winter Guide for Boards & Property Managers
Strata properties in Kelowna and the Central Okanagan face tight parking, shared walkways, and mixed mobility needs. A clear strata snow removal plan helps you stay ahead of storms, reduce slip-and-fall risk, and cut down on resident complaints all season.
Tip: Save this guide with your strata site map and attach it to your snow contract each year.
Why Strata Snow Removal Needs a Specific Plan
- Shared liability: One icy walkway can affect dozens of residents, visitors, and delivery drivers.
- Complex layouts: Multiple buildings, stairs, ramps, and internal roads all need different service levels.
- Parking pressure: Poor snow storage can quickly shrink visitor stalls and accessible parking.
- Documentation: Strata councils are often asked to show that reasonable winter maintenance steps were taken.
A simple written plan—agreed on by council, your property manager, and your contractor—goes a long way toward keeping your site safe and defensible.
Step 1: Map Priority Routes & Risk Areas
Do a 5–10 minute site walk-through
- Primary entrances: main lobby doors, stairwell exits, amenity rooms.
- Accessible routes: ramps, curb cuts, accessible stalls, and paths to them.
- Mail and waste areas: mailroom/cluster boxes, garbage/recycling enclosures.
- Steep sections: internal hills, ramps to underground parking, sloped sidewalks.
- “Problem” zones: places that refreeze daily or collect meltwater.
On your map, label each as Priority 1, 2, or 3 so crews know what must open first during overnight or heavy events.
Step 2: Set Clear Triggers & Response Times
Kelowna winters bring a mix of light skiffs and heavy dumps. Defining when your contractor attends removes guesswork.
- Snowfall trigger depth: e.g. “Attend at 3 cm total accumulation on site.”
- Overnight standard: e.g. “Priority 1 routes open by 7:00 a.m. when trigger is met overnight.”
- Daytime events: e.g. “Attend within X hours of trigger being reached between 6:00 a.m. and 6:00 p.m.”
- Ongoing storms: how multiple passes are handled during longer snowfalls.
Contract tip: Put triggers and response times in writing so expectations and pricing match.
Step 3: Define Hand Work vs. Machine Work
Hand shoveling scope
- Which stairs, landings, and ramps are fully shoveled each visit.
- Required walkway width (for example, wide enough for two people to pass).
- Whether private drive pads, patios, and balconies are included or excluded.
- How accessible routes are handled during heavy storms.
Machine work & parking
- Primary plow/blower routes through internal roads and drive aisles.
- Which visitor and resident stalls are cleared every visit.
- What happens if vehicles do not move before or during storms.
- How snow is stacked and where overflow piles will go.
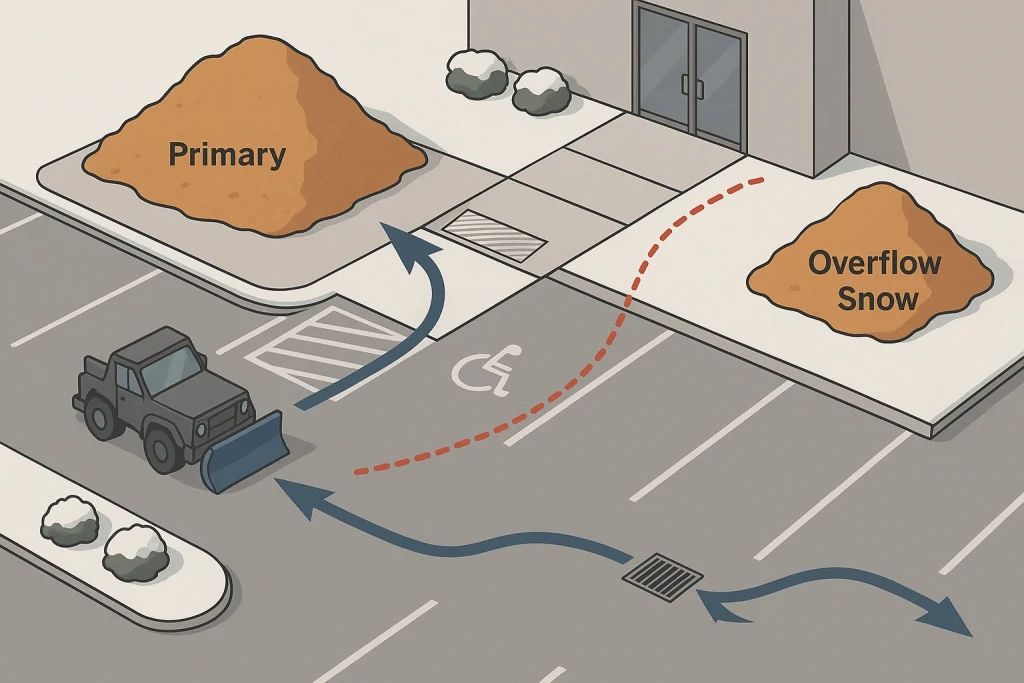
Step 4: Plan Snow Storage & Hauling for Strata Sites
Even with a good plow plan, poor storage can bury drains, block sightlines, and steal parking.
- Keep piles away from hydrants, utility boxes, and mail areas.
- Preserve sightlines at corners, exits, and internal intersections.
- Protect accessible stalls and curb ramps from creeping piles.
- Designate overflow zones for back-to-back storms.
When piles start to encroach on stalls or sightlines, plan to switch from stacking to hauling or relocation.
For a deeper dive, see the Kelowna Snow Storage & Hauling Planning Guide.
Step 5: Anti-Icing, De-Icing & Refreeze Strategy
Kelowna’s freeze–thaw pattern makes ice control as important as plowing.
- Use anti-icing ahead of known freeze events on stairs, ramps, and entrances.
- Apply de-icer after shoveling so it can work on thin snow or bare pavement.
- Identify and monitor daily refreeze zones like shaded walkways or downspout outlets.
- Budget for a spring sweep to remove sand/grit from drains and curb edges.
Step 6: Communication & Documentation
Clear communication between the strata, property manager, and contractor keeps winter maintenance predictable.
- Appoint one or two primary contacts for overnight decisions.
- Agree on preferred communication channels (text, email, phone).
- Decide when you want updates during major events.
- Request basic visit documentation (time-stamped logs; photos on request).
These records are useful for resident updates, insurance questions, and future contract reviews.
Quick Strata Winter Checklist
- ☐ Priority routes and risk areas mapped on a site plan.
- ☐ Snowfall triggers and response times agreed in writing.
- ☐ Hand shoveling vs. machine work scope clearly defined.
- ☐ Snow storage and overflow zones marked; hauling trigger set.
- ☐ Ice control strategy in place for stairs, ramps, and refreeze zones.
- ☐ Primary contacts and communication method confirmed.
- ☐ Simple log or documentation process set up with your contractor.
FAQs
What trigger depth should our strata use?
Many Kelowna stratas choose a 2–5 cm trigger, with lower thresholds on steep driveways and ramps. The right depth depends on your layout, risk tolerance, and budget.
Do we need different standards for stairs and walkways?
Yes. Entrances, stairs, ramps, and accessible routes usually need faster response and more frequent touch-ups than low-traffic areas of the lot.
Who should be the main contact for snow decisions?
Most sites use the property manager plus one council member. Having a short contact list speeds up overnight decisions about extra passes or hauling.
How often should we review the snow plan?
At least once per year, ideally before the season. Update it when building layouts, parking patterns, or tenant mix changes.
Related Services & Guides
Need help turning this into a site-specific plan? Explore our Kelowna snow removal services or dive deeper into winter strategy with the Kelowna Snow Removal Guide and Snow Storage & Hauling Planning Guide.